
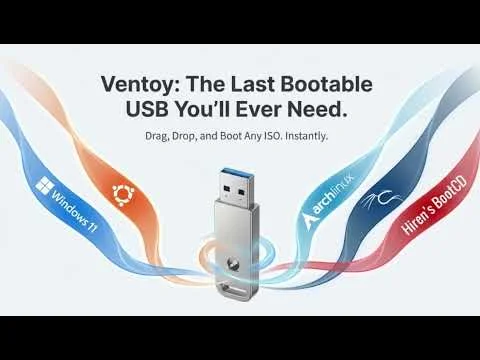
Ventoy is a free, open source multiboot USB creator that uses direct ISO boot technology, allowing you to boot multiple ISO files from a single USB drive without extracting them. Instead of formatting the drive every time you want to add a new operating system, you simply copy ISO files to the USB and select which one to boot from a menu at startup.
Quick Answer: Ventoy creates a multiboot USB drive by installing its bootloader onto a flash drive and allowing you to boot directly from ISO, IMG, WIM, VHD, and EFI files without extracting them. Simply install Ventoy on a USB drive, copy your bootable files onto the drive, and boot from the USB to choose which operating system or utility to launch.
To get started, download the tool, install it onto your USB drive, and add your desired ISO files. Each ISO is automatically added to the boot menu, making it one of the easiest ways to create a multi-system bootable USB drive.
What is Ventoy?

Like many open source bootable USB projects, Ventoy allows anyone to inspect the source code, contribute improvements, or build upon the project. It supports both legacy BIOS and UEFI boot modes, includes support for Secure Boot on compatible systems, and uses an exFAT data partition capable of storing files larger than 4GB.

How It Works
The software works by creating a user accessible exFAT partition for storing bootable files, while also creating a small hidden FAT partition that contains the bootloader and supporting files. While at the same time a second hidden 32MB VTOYEFI bootable FAT partition is created to house the boot menu, GRUB boot loader and core related files. This partitioning method allows for the storage of file sizes larger than 4GB while keeping the boot files on a separate FAT partition.
It is important to note that the exFAT partition VT creates on your flash drive can also still be used for traditional storage purposes. This is unlike tools such as Win32 Disk Imager or Etcher that use DD to Write, or Burn ISO to USB. Those types of tools effectively overwrite the disk content with one single image, essentially creating a USB clone of the source ISO file. Although in some cases (if the disk extents of the source are set properly) you can still create a secondary partition on the device to continue to use for storage purposes.
Supported Boot File Types
Ventoy supports booting many image formats directly from a USB drive, including:
- ISO
- IMG
- WIM
- EFI
- VHD
- VHDX
This broad compatibility makes the utility useful for Linux distributions, Windows installers, recovery environments, diagnostic utilities, and portable operating systems.
Key Features and Plugins
The software provides a wide array of plugins that significantly enhance its functionality. These plugins offer various customization and performance options, making it even more powerful. Below are some of the key plugins and features:
- Persistence Support: Allows you to create persistent storage for Linux distributions such as Ubuntu, Kali, and Arch Linux. This means that system changes, installed software, and personal files will be saved across reboots, giving you a portable OS that retains your data.
- Theme Plugin: Customize the appearance of Ventoy's boot menu by applying different themes. You can modify colors, backgrounds, fonts, and menu layouts to personalize your portable OS loader interface.
- VHD/VHDX Boot: This plugin enables you to boot Windows or Linux from a Virtual Hard Disk (VHD/VHDX) file. This is particularly useful for booting Windows from a USB drive (as a full installation within a file) without installing it directly on the USB or hard disk.
- VDisk Boot Plugin: Allows full Linux distributions to run directly from VDisk files. This lets you boot into a fully functional Linux system without directly installing the OS on the USB, providing more flexibility.
- UEFI Secure Boot Support: It can be configured to boot on UEFI systems with Secure Boot enabled. A special plugin helps you sign the bootloader with your own key, making it possible to bypass Secure Boot restrictions.
- Auto Installation Plugin: This plugin automates the installation of operating systems by loading pre configured settings. Instead of manually inputting installation settings, you can predefine user information, partitions, and software to be installed, streamlining the process.
- Disk Image Boot Plugin: Boot directly from raw disk images (.img files). This is handy for users who want to boot a complete disk image, which could include operating systems or software environments that require direct image booting.
- Custom Menu Entries Plugin: Allows you to create your own custom boot menu entries. This is useful if you have specific ISOs or files you want to organize and display in a custom format within the boot menu.
- Grub2 Mode Plugin: This plugin enables you to switch to use GRUB2 for certain scenarios, providing more flexibility with GRUB2's extensive options for booting complex setups or configurations.
- Checksum Verification Plugin: Before booting an ISO file, this plugin verifies the file's integrity by checking its checksum. This is crucial for ensuring that the file is not corrupted, leading to more reliable boots.
Each of these plugins is managed through a .json configuration file. By editing the ventoy.json file, you can enable or disable plugins and further customize your Multiboot bootable USB experience.
Specifications and Release Information
-
- Authors Website: VT Project Page
- Developer: Hailong Sun (LongPanda)
- Initial release Date: 5 April 2020
- Supported Operating systems: Windows, Linux
- Github Repository: Releases
- Latest Version: Check the official project page for the current release.
Ventoy Windows Bootable USB Drive Creation
Warning: You cannot initially run this tool from your USB device. It will need to format the drive, so store and run it somewhere on your computer. Additionally, you should be aware that during Install, any content currently on your selected device will be wiped clean!
- Download Ventoy and unzip using 7-Zip or similar software.
- Then, navigate to the Ventoy folder and Click Ventoy2Disk.exe
- (1.) Next, select your USB device from the dropdown.
(2.) Click Install.
Using Ventoy to format and prepare bootable USB drive 4. Next, simply Drag and Drop ISO files onto your USB drive.
Note: You can drag and drop multiple ISO files at once.
Drag and Drop ISO files onto the Flash Drive 5. Reboot your PC and enter your Boot Device Menu (typically F9, F12, or ESC), and select your flash drive to use it as the boot device.
6. From the Boot Menu, choose an ISO to launch, and enjoy!
How to Make a Ventoy Bootable USB from Linux
This section covers downloading the Linux based files and extracting them. To begin, navigate to the latest releases section on github. Notice which Ventoy-x.x.xx-tar.gz version is the most recent.
- From your Linux desktop, open a terminal Ctrl+Alt+T
- Next, to download, as a single line, replacing 1.1.12 with the latest version, type the following and then press enter:
wget https://github.com/ventoy/Ventoy/releases/download/v1.1.12/ventoy-1.1.12-linux.tar.gz - To extract the .tar.gz file, type the following:
tar -zxvf ventoy*.tar.gz - Now change to the directory, replacing 1.1.12 with your actual version, type:
cd ventoy-1.1.12Then proceed to follow one of the two sections below.
Make a Linux Multiboot USB using a shell script
The following covers how to make a Multisystem bootable USB by using the shell script. It assumes the terminal is still open at the ventoy-1.1.12 directory from the previous steps.
- First, use the fdisk command to locate which /dev/sdX is your USB device:
sudo fdisk -l - Then, use the chmod command to make the script executable:
chmod +x ./Ventoy2Disk.sh - Next, to run the script and install Ventoy onto your USB
(replacing X with your actual flash device letter), type:./Ventoy2Disk.sh -i /dev/sdX - Now simply copy an ISO file to your USB flash drive.
- Reboot, set your system BIOS or UEFI to boot from the USB device and continue to startup.
- Upon startup, you should be presented with a Boot Menu containing the name of the ISO files you have added. Simply select an ISO from the menu to boot into.
Make a Linux Bootable Flash Drive using the GUI
This section allows you to create your bootable flash drive by using a user friendly Linux based GUI that looks and functions just like the Windows GUI. It assumes that you already have the terminal open and are still in the ventoy-1.1.12 directory.
- Using chmod, make the VentoyGUI GTK QT tool executable:
chmod +x ./VentoyGUI.x86_64 - Then to launch the Linux VentoyGUI tool, type:
./VentoyGUI.x86_64 - (Step 1.) Choose your USB device from the drop list of drives.
(Step 2.) Press the Install button to prepare your selected drive.
Ventoy2Disk Linux GUI - Once the GUI has finished, simply copy some ISO files to your flash drive.
- Reboot and set your BIOS or UEFI to boot from the device. Continue to boot up to see if it works.
- Upon startup, you should be presented with a Boot Menu containing the name of the ISO files you have added. Simply select an ISO from the menu to boot into it.
Using Ventoy with macOS
Currently, Ventoy does not provide a native macOS installer. You cannot create a Ventoy USB directly on macOS. To use Ventoy with a Mac:
- Prepare the Ventoy USB on a Windows or Linux computer.
- Intel based Macs can boot from this USB, but Apple Silicon (M1/M2) Macs are not supported.
- After preparing the USB, plug it into your Mac and select it from the Startup Manager (hold Option/Alt during boot).
Additional Tips and Troubleshooting
Ventoy is designed to be a versatile tool for creating OS booting USBs, but due to the wide range of hardware and firmware standards, you may encounter occasional boot issues. Below are tips and troubleshooting suggestions to help you get the most out of it:
- Firmware Compatibility: Ventoy works by emulating ISO files as virtual CD-ROMs, which requires support from your system's firmware, particularly in UEFI mode. While most standard BIOS/UEFI setups support this method, older or non-standard firmware may cause compatibility issues. Updating your BIOS firmware can sometimes resolve boot issues.
- GRUB2 Mode: If a Linux ISO fails to boot using default mode, try switching to GRUB2 Mode. GRUB2 Mode supports both Legacy BIOS and UEFI but is only compatible with Linux ISOs that include a GRUB2 configuration file. This mode does not support Windows, WinPE, or Unix ISOs, so only use it for Linux distributions that require additional boot flexibility.
- Secure Boot Support: An option is included to enable Secure Boot support for UEFI systems. If you need to boot in Secure Boot mode, you can sign the bootloader with your own Secure Boot key. Refer to the official documentation for detailed steps on configuring Secure Boot.
- Checksum Verification: If you encounter problems when booting an ISO, use the Checksum Verification plugin to confirm that the ISO file is intact and free from corruption. This step ensures a more reliable boot experience.
- Persistence Support: For certain Linux distributions, such as Ubuntu and Kali, Ventoy supports persistence, allowing you to save system changes, installed software, and files across reboots. This feature is especially useful for users who want a portable OS environment that retains data.
- Large File Support: exFAT partitioning allows ISO files larger than 4GB, a limitation of the FAT32 format. Ensure your drive is formatted to exFAT if you plan to store large ISOs, and remember that the drive can also serve as a traditional storage device.
- VHD/VHDX and IMG Booting: Booting from Virtual Hard Disk (VHD/VHDX) and raw disk image (IMG) files is supported. When doing so, you'll need to enable a plugin to allow
ventoy.jsonfile to add these options to your multiboot setup. - USB 3.0/3.1 Ports: If booting fails on a USB 3.x port, try using a USB 2.0 port instead. Older systems may have limited support for USB 3.x in the bootloader, and using a USB 2.0 port can sometimes resolve these issues.
- Custom Menu Entries: If you have many ISOs on your USB, consider setting up custom menu entries for better organization. This feature allows you to create specific boot menu categories and labels, making it easier to navigate through multiple files. You can configure these entries in the
ventoy.jsonfile.
Ventoy ISO Boot Options Explained
When booting an ISO file with Ventoy, you may be presented with multiple boot modes. This is normal. Different operating systems and firmware implementations sometimes
require different startup methods. If one option does not work, simply reboot and try another.
Normal Mode (Default): This is the standard way Ventoy boots an ISO.
The selected ISO is loaded directly using its native boot method, without extracting or modifying the file. Most Linux distributions, Windows installers, and rescue utilities boot correctly using this mode and it should always be tried first.
GRUB2 Mode: GRUB2 Mode forces Ventoy to use the GRUB2 bootloader instead of the ISO's default boot process. This mode is useful when:
- A Linux ISO shows a black screen or freezes during startup
- The system reboots immediately after selecting the ISO
- You need additional kernel or boot menu control
Note: GRUB2 Mode only works with Linux ISOs that include a GRUB2 configuration.
It does not support Windows, WinPE, or Unix-based ISO files.
Memdisk Mode: Memdisk Mode loads the ISO entirely into system memory (RAM) before booting. This mode is best suited for:
- Small Linux distributions
- Diagnostic and recovery utilities
- Lightweight tool ISOs
Because the ISO runs from memory, the USB drive no longer needs to be plugged in after startup, unless you use persistence or need to save anything back to the drive.
This mode is not recommended for large ISO files as obviously the ISO itself will consume your usable system memory.
Pro Tip: If an ISO fails to boot using one method, it does not necessarily mean the ISO or USB drive is broken, just perhaps a system compatibility issue. Different systems behave differently, and switching boot modes often resolves the issue.
Understanding Ventoy Boot Errors

If you encounter the following errors when attempting to boot an ISO using Ventoy, they typically indicate a serious problem with how Ventoy or the Linux initramfs environment is being accessed during early boot.
/ventoy/busybox/busybox: permission denied
/ventoy/busybox/xzcat: not found
/ventoy/busybox/chmod: not found
/ventoy/busybox/sh: not found
kernel panic - not syncing: attempted to kill init
What These Errors Mean
/ventoy/busybox/busybox: permission denied
BusyBox is a critical multi call binary used during early Linux boot. This error means the kernel was able to locate the file, but it could not execute it. Common causes include incorrect filesystem mount options, a corrupted Ventoy installation, or a filesystem that does not preserve executable permissions.
/ventoy/busybox/xzcat: not found
/ventoy/busybox/chmod: not found
/ventoy/busybox/sh: not found
These utilities are normally provided as symbolic links to the BusyBox binary. When they cannot be found, it usually means BusyBox never executed successfully, so the environment required to expose those commands was never initialized.
kernel panic - not syncing: attempted to kill init
The Linux kernel relies on an init process (PID 1) to continue booting. When BusyBox or the init script fails to run, the kernel has no recovery path and triggers a panic to prevent further damage.
Common Causes
- USB filesystem mounted with noexec - Some systems or tools mount removable media with the
noexecflag, preventing binaries from running. - Unsupported or incompatible filesystem - Certain Ventoy versions or firmware combinations may fail when using exFAT, NTFS, or unusual partition layouts.
- Corrupted Ventoy files - An incomplete Ventoy installation or interrupted update can leave BusyBox binaries unreadable or non-executable.
- Secure Boot or firmware restrictions - Some UEFI implementations block execution of unsigned or improperly loaded boot components.
- Problematic ISO image - The ISO itself may not be fully compatible with Ventoy or may require special boot parameters.
I've found the most likely cause to be a problematic ISO. Typically older ones that are not supported.
How to Fix or Troubleshoot
- Reinstall Ventoy on the USB drive using the latest stable version.
- Try a different filesystem when creating the Ventoy USB, such as FAT32 instead of exFAT or NTFS.
- Disable Secure Boot temporarily in UEFI firmware and test again.
- Test the same ISO using a traditional write ISO to USB method to confirm the ISO itself is not broken.
- Try a different USB flash drive, preferably one known for reliable boot compatibility.
Summary
These errors are not normal Linux boot messages. They indicate that Ventoy’s minimal boot environment cannot execute its own core tools, which almost always points to a permissions, filesystem, or firmware compatibility issue rather than a simple configuration mistake.
Ventoy Pros and Cons
Advantages
- Create a multiboot USB without reformatting
- Supports ISO, IMG, WIM, VHD, VHDX, and EFI files
- Works with BIOS and UEFI systems
- Supports Secure Boot
- Uses exFAT allowing files larger than 4GB
- Open source and actively maintained
Disadvantages
- Not every ISO is fully compatible
- No native macOS creation utility
- Advanced features require editing ventoy.json
- Some older systems may have boot compatibility issues
Ventoy vs Rufus
Ventoy and Rufus are two popular USB boot tools that serve slightly different purposes.
- Ventoy: For storing and booting multiple ISO files from one USB drive.
- Rufus: For creating a traditional single bootable USB from one ISO.
If you regularly work with Linux distributions, Windows installers, rescue disks, or diagnostic tools, Ventoy is the more flexible solution because new ISOs can simply be copied to the drive without recreating the USB.
While Ventoy popularized direct ISO booting from a USB drive, multiboot USB tools existed long before its release. One of the earliest widely used solutions was YUMI, originally developed by Pendrive Linux in late 2009.
Ventoy vs YUMI
YUMI and Ventoy are both popular multiboot USB creation tools, but YUMI predates Ventoy by many years. Originally developed as the earliest widely available multiboot USB creator, YUMI used its own methods for adding and booting multiple operating systems from a single USB drive.
Modern versions of YUMI have adopted the Ventoy bootloader for direct ISO booting while continuing to provide the additional features and workflow enhancements that have long been part of the YUMI experience.
Both tools support drag and drop ISO booting, BIOS and UEFI systems, Secure Boot compatibility, persistence, VHD/VHDX booting, and multiboot USB creation. However, YUMI also provides additional management features including guided persistence creation, VHD/VHDX management tools, and a categorized list of distributions and utilities with links to their official project pages.
For users who want a straightforward drag and drop ISO boot solution, Ventoy is an excellent choice. For those who prefer that same core boot technology combined with additional management features, software discovery tools, and guided setup options, YUMI might provide a more comprehensive multiboot USB creation experience.
Frequently Asked Questions
What is Ventoy and how does it work?
Ventoy is an open source tool for creating a Multibooting flash drive, allowing you to boot multiple ISO files from a single USB device. It works by creating an exFAT partition for storing ISO files and a separate FAT partition for boot files, making it easy to drag and drop ISO files onto the drive.
Can I use Ventoy on both Windows and Linux?
Yes, it works on both Windows and Linux operating systems, making it a versatile tool for users on different platforms.
How do I create a Multiboot USB using Ventoy?
Simply prepare your USB drive using Ventoy, then drag and drop ISO files onto the USB drive. You can then boot from the USB and select an ISO file from the boot menu to run.
Does Ventoy support large ISO files?
Yes, it supports storing and booting from ISO files larger than 4GB by using the exFAT file system, unlike other tools that use FAT32 and limit file size.
Can I add persistence support for Linux distributions?
Yes, the bootable USB software supports persistence for several Linux distributions, such as Ubuntu and Kali Linux via the use of a plugin. This allows you to retain system changes, installed software, and personal files between reboots.
What if I encounter boot issues?
If you experience issues booting, try switching to GRUB2 mode for Linux ISOs, ensure your system's firmware is up to date, and check the integrity of your ISO files with checksum verification.
Is Secure Boot supported?
Yes, this USB boot creator supports Secure Boot for UEFI systems, and you can configure it to work by signing the bootloader with your own key.
Is Ventoy the Best Multiboot USB Creator?
Ventoy is a powerful and easy to use tool that lets you boot multiple operating systems and utilities from a single USB drive. With drag & drop simplicity, support for both legacy BIOS and UEFI, and the ability to handle large ISO files via exFAT, it significantly simplifies managing multiple bootable operating systems from a single USB drive, especially for Linux users who work with bootable media regularly.
It also supports advanced plugin features like persistence, Secure Boot, and booting from VHD/VHDX or raw disk images. Plus, you can customize the boot menu to fit your workflow perfectly.
I've personally tested Ventoy with dozens of Linux distributions, Windows installers, rescue environments, and utility ISOs. For users who frequently work with bootable media, it remains one of the most convenient multiboot USB solutions available. While occasional hardware compatibility issues can arise, documentation and active community forums offer plenty of troubleshooting help.
Unlike traditional single ISO to USB creators like Rufus, it gives you a flexible, reliable multiboot solution which is perfect for sysadmins, tech enthusiasts, or anyone juggling multiple OS installs. Try it today and see if it helps simplify your boot process.