
This tutorial explains how to create a modern BunsenLabs or CrunchBang++ bootable USB flash drive with optional persistence. CrunchBang Linux itself has been discontinued, but its lightweight Openbox based philosophy lives on through active community driven successors.
BunsenLabs and CrunchBang++ Bootable USB Guide
- Project status: CrunchBang Linux discontinued
- Active successors: BunsenLabs Linux, CrunchBang++
- Base: Debian Stable
- Desktop: Openbox
- Minimum USB size: 4GB
- Persistence support: Yes
Learn how to create a modern bootable BunsenLabs or CrunchBang++ USB flash drive using Windows or Linux. This guide covers Universal USB Installer, persistence options, and the
dd method for advanced users.What Was CrunchBang Linux?
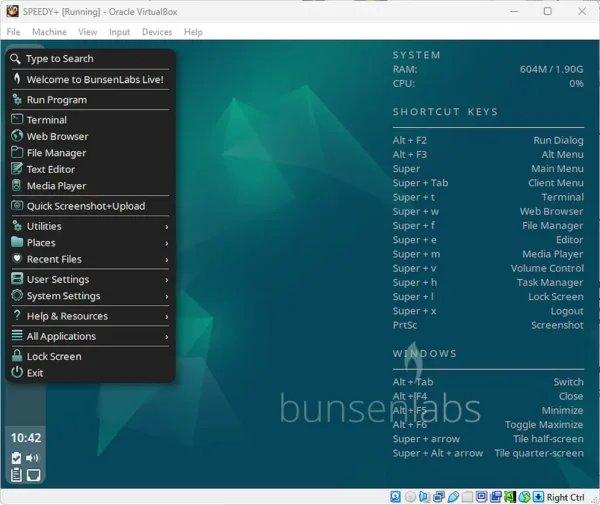
CrunchBang Linux, often written as #! (hashbang), was a fast, minimalist Debian based distribution created by Philip Newborough. It focused on simplicity, speed, and efficiency using the Openbox window manager and a carefully selected set of lightweight applications.
In 2015, the original project was officially discontinued. Users were encouraged to migrate to community driven successors that preserved the same design philosophy.
Modern CrunchBang Successors
- BunsenLabs Linux: The most widely adopted continuation, offering a polished Openbox experience on Debian Stable.
- CrunchBang++: A close recreation of the original CrunchBang look and feel with modern package updates.
Both projects remain excellent choices for older hardware, virtual machines, or users who prefer a distraction free desktop.
Why Run BunsenLabs from a USB Flash Drive?
- Portable Linux environment that runs on most PCs
- Excellent performance on older systems
- Optional persistence to save files and settings
- Great for testing, troubleshooting, or daily lightweight use
What You Will Need
- BunsenLabs or CrunchBang++ ISO file
- Windows or Linux system
- A fast USB flash drive (4GB or larger)
- Uni USB Installer for Windows or the
ddcommand on Linux
Create a BunsenLabs Bootable USB from Windows
This is the easiest method for most users and supports persistence.
- Download the latest ISO from the official BunsenLabs download page.
- Download and start (UUI) Uni USB Installer.
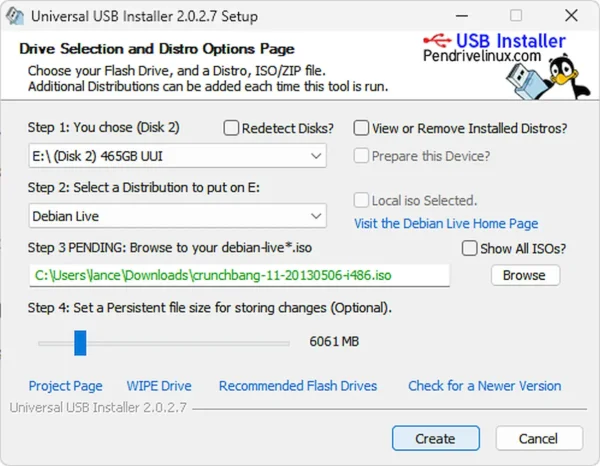
- Select your USB device from the drop list and tick the box to Prepare Drive.
- From the distribution list, choose Debian Live or Try Unlisted ISO.
- Browse to and select the BunsenLabs or CrunchBang++ ISO file.
- Set the persistence slider if desired.
- Click Create and wait for completion.
Once finished, reboot your PC and select the USB device from your BIOS or boot menu.
Create a Bootable BunsenLabs USB Using dd (Linux)
Advanced users may prefer the dd method, which writes the ISO directly to the USB device.
Steps
- Download the BunsenLabs or CrunchBang++ ISO.
- Insert your USB flash drive.
- Identify the device name:
lsblk - Unmount any mounted partitions:
sudo umount /dev/sdX* - Write the ISO to the USB drive:
sudo dd if=/path/to/bunsenlabs.iso of=/dev/sdX bs=4M status=progress - Wait for completion and sync:
sync
After completion, reboot and boot from the USB device.
Notes on Persistence
When using dd, persistence requires manual configuration and varies by distribution. For most users, Universal USB Installer is the recommended option if persistence is desired.
Create a BunsenLabs Bootable USB from macOS
This section shows how to create a bootable BunsenLabs (CrunchBang successor) USB flash drive from macOS using the built in command line tools. This method works on both Intel and Apple Silicon Macs.
Important: This process will erase all data on the selected USB drive. Double check the disk identifier before proceeding.
Requirements
- macOS system
- BunsenLabs ISO file
- 4GB or larger USB flash drive
Steps to Create the USB on macOS
- Download the BunsenLabs ISO from the official website.
- Insert your USB flash drive into the Mac.
- Open Terminal and list attached disks:
diskutil listIdentify your USB device, for example
/dev/disk2. - Unmount the USB drive (do not eject it):
diskutil unmountDisk /dev/disk2Replace
disk2with your actual disk identifier. - Write the ISO to the USB using dd. Using
rdiskimproves write speed:sudo dd if=/path/to/bunsenlabs.iso of=/dev/rdisk2 bs=4m status=progressEnter your macOS password when prompted.
- Wait for the write process to complete. This may take several minutes.
- Once finished, eject the USB drive:
diskutil eject /dev/disk2
Booting the USB
Insert the USB drive into the target computer. Enter the system boot menu or BIOS and select the USB device to boot into BunsenLabs Linux.
Persistence Notes for macOS
BunsenLabs and Debian based live systems typically require manual persistence setup. Creating persistent storage is best done from Linux or using tools like Universal USB Installer or YUMI on Windows. The macOS dd method creates a standard live USB without persistence by default.
This macOS method is best suited for testing, troubleshooting, or running a temporary live environment.
Final Thoughts
While CrunchBang Linux itself is no longer maintained, its minimalist Openbox driven design lives on through excellent modern alternatives like BunsenLabs and Crunch Bang++. Running these distributions from a USB flash drive is a great way to revive older hardware, build a portable Linux environment, or experiment without touching your installed OS.
For more Linux USB tutorials, multiboot tools, and performance focused flash drive recommendations, explore our other bootable USB guides.