Changing the Ubuntu Start Menu Panel Icon: Want to remove the default Ubuntu branding and give your desktop a unique look? While modern Ubuntu no longer uses the classic GNOME 2 "Start Menu," every Ubuntu flavor still provides ways to customize or replace its application launcher. Depending on your desktop environment, you can swap the default Ubuntu logo, use a custom icon, install a different application menu, or even change your entire icon theme for a completely personalized appearance.
This guide covers both modern and legacy versions of Ubuntu. You'll learn the recommended methods for changing menu icons in GNOME Shell, KDE Plasma, Xfce, Cinnamon, MATE, Budgie, and LXQt, along with the classic GNOME 2 technique used on older Ubuntu releases.
Customize Ubuntu Start Menu Icon
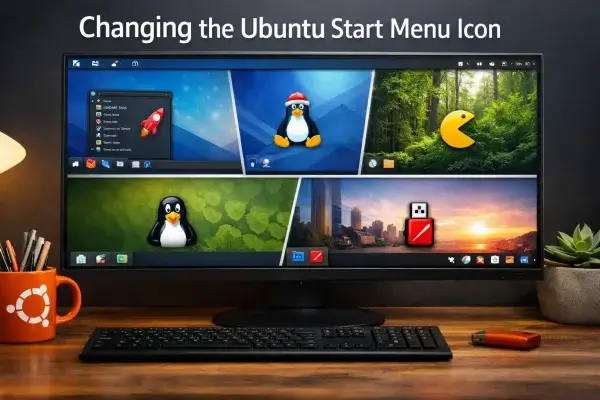
Whether you're creating a cleaner desktop, removing Ubuntu branding, matching a custom icon theme, or building your own Linux distribution, changing the Start Menu icon is one of the easiest ways to personalize your desktop.
Unlike Windows, Ubuntu doesn't use a single Start Menu implementation. The application launcher depends entirely on the desktop environment you're running, so the steps differ between Ubuntu, Kubuntu, Xubuntu, Ubuntu MATE, Ubuntu Cinnamon, Ubuntu Budgie, and Lubuntu.
Fortunately, nearly every modern desktop provides a supported way to customize its launcher without modifying system files.
Why Change the Ubuntu Menu Icon?
Replacing the default Ubuntu logo isn't just about appearance. Many users customize the menu button to create a more consistent desktop experience.
Common reasons include:
- Remove Ubuntu branding.
- Match an installed icon theme.
- Create a cleaner minimalist desktop.
- Use your own company or project logo.
- Build a custom Linux distribution.
- Improve visibility by using a larger or higher-contrast icon.
- Create a desktop that looks similar across multiple Linux distributions.
The safest approach is always to use your desktop environment's built-in customization tools instead of replacing files inside the operating system.
Which Desktop Environment Are You Using?
The method you use depends entirely on your desktop environment.
| Ubuntu Flavor | Desktop Environment | Custom Menu Icon Support |
|---|---|---|
| Ubuntu | GNOME Shell | Via Extensions |
| Kubuntu | KDE Plasma | Built In |
| Xubuntu | Xfce | Built In |
| Ubuntu Cinnamon | Cinnamon | Built In |
| Ubuntu MATE | MATE | Built In |
| Ubuntu Budgie | Budgie | Built In |
| Lubuntu | LXQt | Built In |
| Legacy Ubuntu | GNOME 2 | Manual Icon Replacement |
Modern Ubuntu Desktop Environments
Modern Linux desktops no longer rely on replacing system icon files to change the menu button. Instead, nearly every desktop environment allows customization through panel settings, launcher properties, extensions, or icon themes.
This approach is far safer because your customizations survive system updates and can easily be changed or reversed later.
In the following sections we'll walk through each supported Ubuntu desktop environment individually so you can use the method that's appropriate for your system.
Change the Ubuntu GNOME Shell Start Menu Icon
The standard Ubuntu desktop uses GNOME Shell, which is different from the classic GNOME 2 desktop used by older Ubuntu releases. Instead of a traditional Applications menu button, modern Ubuntu uses the Activities overview and an application grid.
The default GNOME Shell Activities button is not designed to be directly replaced by editing an icon file. Modern Ubuntu stores these interface elements differently, and manually changing system files can be overwritten during updates.
The recommended approach is to use GNOME Shell extensions that provide a customizable application menu.
Using ArcMenu to Replace the Ubuntu Menu Button
ArcMenu is one of the most popular GNOME Shell extensions for replacing the default Activities button with a traditional Start Menu style launcher. It provides complete control over the menu appearance, including the ability to use a custom icon.
With ArcMenu you can:
- Replace the default Ubuntu Activities button.
- Choose from built-in menu icons.
- Upload your own custom image.
- Create a Windows-style Start Menu layout.
- Customize menu position, size, and behavior.
- Hide Ubuntu branding from the launcher.
Install ArcMenu
- Install the GNOME Extensions application:
sudo apt install gnome-shell-extension-manager- Open Extension Manager.
- Search for ArcMenu.
- Install and enable the extension.
Alternatively, ArcMenu can be installed through the official GNOME Extensions website.
Change the ArcMenu Icon
After installing ArcMenu:
- Open ArcMenu Settings.
- Select the Menu Button Appearance section.
- Enable a custom icon.
- Select an included icon or choose your own image.
Your new launcher icon should appear immediately on the GNOME panel.
Recommended Icon Sizes
For the best appearance, use an icon designed for panel use.
Recommended formats:
- SVG: Best choice for scaling and modern Linux desktops.
- PNG: Works well for custom logos and artwork.
- Size: 24x24, 32x32, or 48x48 pixels.
A simple SVG logo usually provides the cleanest result because it remains sharp at different panel sizes.
Using Dash to Panel for a Traditional Start Menu Layout
If you prefer a Windows-style desktop, Dash to Panel combines the GNOME top bar and dock into a single customizable panel.
Features include:
- Move the panel to the bottom of the screen.
- Create a traditional taskbar layout.
- Add a configurable application menu button.
- Customize panel appearance and behavior.
Dash to Panel is useful for users who want Ubuntu to feel more like a traditional desktop operating system while still keeping the GNOME Shell foundation.
Changing Ubuntu Icons With Icon Themes
If your goal is to remove Ubuntu branding completely, changing only the menu icon may not be enough. A complete icon theme replacement can transform the entire desktop.
Popular Linux icon themes include:
- Papirus: Modern and highly polished icon set.
- Numix: Flat, colorful desktop icons.
- Tela: Clean and contemporary design.
- Adwaita: The default GNOME design language.
Install GNOME Tweaks to manage appearance settings:
sudo apt install gnome-tweaksThen open:
GNOME Tweaks → Appearance → Icons
and select your preferred icon theme.
Removing Ubuntu Branding From GNOME
If you want a more neutral desktop appearance, several GNOME elements can be customized:
- Replace the menu launcher icon using ArcMenu.
- Change the icon theme.
- Install a different GTK theme.
- Customize the wallpaper and login appearance.
- Replace Ubuntu-specific extensions with standard GNOME extensions.
For a fully custom desktop experience, many users combine:
- A custom GTK theme.
- A matching icon theme.
- ArcMenu or Dash to Panel.
- A custom wallpaper.
- Custom fonts.
This allows Ubuntu to look completely different while remaining fully supported and update friendly.
Change the Kubuntu KDE Plasma Start Menu Icon
Kubuntu uses the KDE Plasma desktop environment, which is one of the most customizable Linux desktops available. Unlike GNOME Shell, KDE provides built-in controls for changing the application launcher icon without installing additional extensions or modifying system files.
The default KDE application launcher is called Kickoff. It functions much like the traditional Windows Start Menu and can be customized directly from the panel.
Change the Kickoff Application Launcher Icon
To replace the default KDE menu icon:
- Right click the Application Launcher icon on the panel.
- Select Configure Application Launcher.
- Click the current icon to open the icon selector.
- Choose an icon from your installed icon themes or select a custom image.
- Click OK to apply the change.
The new menu icon should appear immediately without restarting the desktop.
Use a Custom Logo or Personal Branding
KDE Plasma makes it easy to create a completely personalized desktop. Instead of using the default KDE logo, you can replace the launcher icon with:
- Your own logo.
- A custom distribution icon.
- A favorite application symbol.
- A themed icon matching your desktop style.
For best results, use an SVG image because KDE can scale vector icons cleanly at different panel sizes.
Recommended Icon Formats
KDE supports common image formats, including:
- SVG: Recommended for scalable desktop icons.
- PNG: Good for custom artwork and logos.
- ICO: Supported in many cases but less common on Linux desktops.
A 32x32 or 48x48 SVG icon usually works well for a standard KDE panel.
Changing KDE Icon Themes
If you want more than just a new Start Menu icon, KDE allows you to replace the entire desktop icon set.
Open:
System Settings → Appearance → Icons
From here you can:
- Install new icon themes.
- Switch between installed themes.
- Preview available designs.
- Create a consistent desktop appearance.
Popular KDE compatible icon themes include:
- Breeze: Default KDE Plasma theme.
- Papirus: Modern and widely supported.
- Numix: Flat and colorful design.
- La Capitaine: macOS inspired appearance.
Replacing Ubuntu Branding in Kubuntu
KDE Plasma separates the desktop appearance from the underlying operating system, making it easy to remove distribution branding.
To create a fully customized Kubuntu desktop:
- Replace the Kickoff launcher icon.
- Install a custom icon theme.
- Change the Plasma theme.
- Customize panel colors and transparency.
- Replace the wallpaper.
- Adjust fonts and window decorations.
Because these settings are stored in your user profile, they do not require root access and are normally preserved during system updates.
Using KDE Widgets for Additional Customization
KDE Plasma widgets provide another way to personalize your desktop layout.
You can add or modify:
- Application launchers.
- System monitors.
- Clocks.
- Weather displays.
- Custom shortcuts.
- Quick access menus.
This flexibility makes KDE Plasma a popular choice for users who want their Linux desktop to look completely different from the default installation.
KDE Plasma Customization Summary
| Customization | Method |
|---|---|
| Change Start Menu icon | Kickoff launcher settings |
| Replace Ubuntu/KDE branding | Custom icon and theme selection |
| Change all desktop icons | System Settings → Icons |
| Modify panel layout | Panel edit mode |
| Create custom desktop style | Plasma themes and widgets |
KDE Plasma remains one of the easiest Linux desktops to fully customize. If your goal is to remove default branding and create a desktop that feels completely unique, Kubuntu provides nearly everything needed directly out of the box.
Change the Xubuntu Xfce Start Menu Icon
Xubuntu uses the Xfce desktop environment, a lightweight and highly configurable desktop designed for speed and simplicity. While it uses fewer resources than GNOME or KDE Plasma, Xfce still provides plenty of options for customizing the application launcher, panel, and overall appearance.
The default Xubuntu menu is usually the Whisker Menu, although some installations may use the traditional Applications Menu plugin. Both allow you to replace the default icon and remove Xubuntu branding from the panel.
Change the Whisker Menu Icon
To replace the Xubuntu Start Menu icon:
- Right click the menu button on the panel.
- Select Properties.
- Locate the Icon option.
- Click the current icon.
- Select a new icon from your installed theme or browse for a custom image.
- Close the settings window to apply the change.
The new icon should appear immediately without requiring a logout or system restart.
Change the Applications Menu Icon
If your Xubuntu installation uses the traditional Applications Menu:
- Right click the panel.
- Select Panel → Panel Preferences.
- Open the Items tab.
- Select Applications Menu.
- Click the edit button.
- Choose a replacement icon.
Create a Fully Custom Xubuntu Desktop
Xfce is popular among users who want a fast desktop that can still be heavily customized. Beyond changing the menu icon, you can modify nearly every visual element.
Common customizations include:
- Replace the Xubuntu menu icon.
- Install a different icon theme.
- Change GTK application themes.
- Move or resize the panel.
- Adjust panel transparency.
- Create a Windows, macOS, or completely unique layout.
Because Xfce stores most settings in your user profile, these changes are safe and reversible.
Install Custom Xfce Icon Themes
Changing the menu icon is often the first step toward removing distribution branding. Installing a complete icon theme can provide a more consistent appearance across the entire desktop.
Popular Xfce compatible icon themes include:
- Papirus: Modern icon theme with broad Linux support.
- Numix: Flat and colorful desktop icons.
- Elementary: Clean and minimal design.
- Adwaita: GNOME inspired default styling.
After installing an icon theme:
- Open Settings Manager.
- Select Appearance.
- Open the Icons tab.
- Select your preferred icon theme.
The panel menu icon and application icons will update automatically.
Replace Xubuntu Branding
Many users customize Xubuntu because they want a neutral or personalized Linux desktop. Xfce makes this simple because the desktop environment is not tightly tied to a specific distribution identity.
You can replace Xubuntu branding by changing:
- The Whisker Menu icon.
- The desktop wallpaper.
- The icon theme.
- The GTK theme.
- The panel layout.
- The login screen appearance.
This makes it possible to create a lightweight custom workstation, kiosk system, or personalized Linux environment without changing the underlying operating system.
Xfce Panel Customization Tips
The Xfce panel provides many additional customization options.
Right click the panel and select:
Panel → Panel Preferences
From here you can:
- Add or remove panel items.
- Move the menu button.
- Change panel size.
- Enable transparency.
- Create additional panels.
- Position the panel anywhere on the screen.
A common setup is moving the Xubuntu panel to the bottom of the screen and combining it with a custom launcher icon to create a familiar desktop experience similar to Windows.
Xubuntu Xfce Customization Summary
| Customization | Method |
|---|---|
| Change Whisker Menu icon | Menu Properties |
| Change Applications Menu icon | Panel Item Settings |
| Change desktop icons | Appearance Settings |
| Modify panel layout | Panel Preferences |
| Remove Xubuntu branding | Custom themes and icons |
Why Choose Xfce for a Custom Desktop?
Xfce is an excellent choice for users who want complete control without the resource requirements of heavier desktop environments. It provides a traditional desktop layout, extensive configuration options, and excellent performance even on older hardware.
For anyone building a personalized Linux workstation, Xubuntu provides a strong balance between speed, stability, and customization.
Change the Ubuntu MATE Start Menu Icon
Ubuntu MATE is one of the easiest Ubuntu flavors to customize because it continues the traditional desktop design of the older GNOME 2 environment. If you prefer a classic Applications menu, panel layout, and full control over desktop appearance, MATE provides many of the same customization options that made older Ubuntu releases popular.
The default Ubuntu MATE menu is a panel applet, meaning the launcher icon can be changed directly through the desktop interface without installing extensions or modifying system files.
Change the MATE Menu Icon
To replace the Ubuntu MATE menu button icon:
- Right click the Menu button on the panel.
- Select Properties.
- Click the current menu icon.
- Select a new icon from your installed icon theme.
- Choose a custom image if you want to use your own logo or artwork.
- Close the properties window to apply the change.
The new menu icon should appear immediately.
Change the Traditional MATE Main Menu
Some Ubuntu MATE installations use the traditional Applications / Places / System panel layout.
To customize the menu:
- Right click the menu panel applet.
- Select Preferences or Properties.
- Choose a different icon.
- Apply the changes.
This allows you to remove the default Ubuntu MATE branding and replace it with any icon that matches your desktop theme.
Create a Completely Custom Ubuntu MATE Desktop
Because MATE closely follows the classic desktop model, it is especially popular among users who want a traditional but highly customizable Linux experience.
You can customize:
- The Start Menu icon.
- The panel layout.
- The desktop theme.
- The window borders.
- The icon theme.
- The wallpaper.
- The login screen.
This makes Ubuntu MATE a popular choice for creating custom workstations, retro-style desktops, and lightweight systems.
Changing MATE Icon Themes
Changing the menu icon alone removes one piece of branding, but a complete icon theme replacement creates a more consistent appearance.
To change the icon theme:
- Open Control Center.
- Select Appearance.
- Open the Theme tab.
- Select a theme containing your preferred icons.
Popular icon themes that work well with MATE include:
- Papirus: Modern and widely supported across Linux desktops.
- Numix: Flat design with colorful icons.
- Faenza: Classic Linux icon theme.
- Adwaita: Clean GNOME style appearance.
Using MATE Layouts to Remove Ubuntu Branding
One unique feature of Ubuntu MATE is its built-in desktop layouts. These allow you to quickly transform the appearance of the desktop.
Available layouts may include:
- Traditional: Classic GNOME 2 style with Applications, Places, and System menus.
- Cupertino: macOS inspired layout.
- Redmond: Windows style layout.
- Mutiny: Ubuntu Unity inspired layout.
To change layouts:
- Open MATE Tweak.
- Select Panel or Interface settings.
- Choose your preferred desktop layout.
This makes it possible to completely change the look and feel of Ubuntu MATE without manually configuring every component.
Creating a Custom MATE Menu Icon
If you want to use your own logo or artwork:
- Create an SVG icon for the best scaling quality.
- Use a PNG image for simple custom graphics.
- Choose an icon size matching your panel height.
Recommended sizes:
| Panel Size | Recommended Icon |
|---|---|
| 24 pixel panel | 24x24 or 32x32 icon |
| 32 pixel panel | 32x32 or 48x48 icon |
| Large custom panels | SVG scalable icon |
Ubuntu MATE Customization Summary
| Customization | Method |
|---|---|
| Change menu icon | Panel applet properties |
| Change complete desktop style | MATE Tweak layouts |
| Replace icon theme | Appearance settings |
| Modify panel arrangement | Panel preferences |
| Remove Ubuntu branding | Custom themes, icons, and layouts |
Why Choose Ubuntu MATE for Customization?
Ubuntu MATE is one of the best choices for users who want a familiar desktop that can be customized extensively. It combines the simplicity of traditional Linux desktops with modern features, making it easy to create a system that feels completely personal.
For users who miss the classic Ubuntu desktop experience or want full control over their Linux environment, MATE remains one of the most flexible options available.
Change the Ubuntu Cinnamon Start Menu Icon
Ubuntu Cinnamon uses the Cinnamon desktop environment, which was originally developed for Linux Mint and is designed around a familiar traditional desktop layout. With a panel, taskbar, and Start Menu style application launcher, Cinnamon is one of the easiest Linux desktops to customize.
The default Cinnamon menu is provided by the Cinnamon Menu applet. Unlike GNOME Shell, Cinnamon allows you to change the menu icon directly from the panel settings without installing additional extensions.
Change the Cinnamon Menu Icon
To replace the default Ubuntu Cinnamon menu icon:
- Right click the Menu button on the panel.
- Select Configure.
- Open the menu applet settings.
- Locate the Icon option.
- Select a different icon or enter the path to your own custom image.
- Save the changes.
The new launcher icon should appear immediately.
Using a Custom Cinnamon Menu Icon
If you want to remove Ubuntu branding or create a custom desktop identity, you can replace the default icon with:
- Your own logo.
- A custom Linux distribution icon.
- A matching icon from your desktop theme.
- A personal image or design.
For the cleanest results, use an SVG icon because Cinnamon can scale it smoothly at different panel sizes.
Customize Cinnamon Themes and Icons
Changing only the Start Menu icon can make a noticeable difference, but Cinnamon also supports complete desktop customization through themes.
Open:
System Settings → Themes
From here you can customize:
- Controls.
- Window borders.
- Icons.
- Desktop themes.
- Mouse pointer styles.
Popular Cinnamon compatible themes include:
- Mint-Y: The default Linux Mint style.
- Adapta: Modern flat design.
- Arc: Clean GTK based theme.
- Papirus: Popular modern icon theme.
Using Cinnamon Spices for More Customization
One of Cinnamon's biggest advantages is the built-in support for downloadable customization components called Spices.
Spices include:
- Applets: Add new panel features.
- Desklets: Add desktop widgets.
- Extensions: Modify Cinnamon behavior.
- Themes: Change the complete appearance.
To browse available customizations:
- Open System Settings.
- Select Extensions, Applets, or Themes.
- Download and enable your preferred additions.
Create a Windows Style Ubuntu Cinnamon Desktop
Many users choose Cinnamon because its default layout feels familiar to Windows users. With a few changes, you can create a traditional desktop environment while still using Linux.
Common customizations include:
- Move the panel to the bottom of the screen.
- Replace the menu icon with a custom Start button.
- Add application shortcuts.
- Use a Windows-like theme.
- Customize the system tray.
- Adjust panel transparency.
Create a Completely Custom Cinnamon Desktop
For users who want a unique appearance, Cinnamon provides nearly everything needed to remove default Ubuntu branding.
A fully customized Cinnamon desktop can include:
- A custom launcher icon.
- A personalized icon theme.
- A custom GTK theme.
- Unique wallpapers.
- Custom fonts.
- Modified panel layouts.
- Additional Cinnamon applets.
Because these changes are managed through Cinnamon's settings system, they are easy to undo and generally survive software updates.
Cinnamon Custom Menu Icon Tips
For the best looking panel launcher:
- Use SVG files whenever possible.
- Match the icon style to your installed theme.
- Avoid overly detailed images that become unclear at small sizes.
- Use transparent backgrounds for a cleaner appearance.
Recommended icon sizes:
| Panel Height | Recommended Icon Size |
|---|---|
| 24 pixels | 24x24 SVG or PNG |
| 32 pixels | 32x32 or 48x48 icon |
| Large custom panels | SVG scalable icon |
Ubuntu Cinnamon Customization Summary
| Customization | Method |
|---|---|
| Change Start Menu icon | Cinnamon Menu applet settings |
| Change icon theme | System Settings → Themes |
| Add panel features | Cinnamon Applets |
| Modify desktop behavior | Cinnamon Extensions |
| Remove Ubuntu branding | Custom icons, themes, and layouts |
Why Choose Cinnamon for Customization?
Cinnamon provides one of the best balances between simplicity and customization. It offers a traditional Start Menu style desktop while providing modern features, making it an excellent choice for users who want a familiar interface that can still be completely personalized.
For anyone looking to replace Ubuntu branding and create a desktop that feels uniquely their own, Ubuntu Cinnamon provides an easy and powerful customization experience.
Change the Ubuntu Budgie Start Menu Icon
Ubuntu Budgie uses the Budgie desktop environment, a modern Linux desktop built around simplicity, elegance, and customization. Like Cinnamon and Xfce, Budgie uses a traditional panel layout with an application launcher that can be customized without replacing system files.
The default Budgie launcher is called the Budgie Menu. Its icon can be changed directly through panel settings, making it easy to remove Ubuntu Budgie branding or create a completely personalized desktop appearance.
Change the Budgie Menu Icon
To replace the default Budgie Menu icon:
- Right click the Budgie Menu icon on the panel.
- Select Preferences or open Budgie Desktop Settings.
- Locate the menu or launcher applet settings.
- Choose a different icon.
- Select a custom image if you want to use your own logo or artwork.
- Apply the changes.
The new icon should appear immediately on the panel.
Using a Custom Budgie Launcher Icon
Replacing the default menu icon is useful when creating a personalized Linux desktop or removing distribution branding.
Common replacements include:
- A personal logo.
- A company or organization logo.
- A custom Linux distribution icon.
- A themed application launcher icon.
- A minimalist custom symbol.
SVG icons are recommended because they remain sharp when the panel size changes.
Customize the Budgie Desktop Appearance
Budgie separates the desktop interface from the underlying operating system, making it easy to create a custom appearance.
You can modify:
- The menu icon.
- The desktop theme.
- The icon theme.
- The panel position.
- The panel size.
- The Raven sidebar.
- The wallpaper.
- The window appearance.
These changes are stored in your user settings and do not require manually editing system files.
Change Budgie Themes and Icons
A complete theme change can remove most remaining Ubuntu Budgie branding and give the desktop an entirely new style.
Open:
Budgie Desktop Settings → Style
From here you can adjust:
- Widget themes.
- Icon themes.
- Cursor themes.
- Dark and light appearance options.
Popular Linux themes that work well with Budgie include:
- Papirus: Modern icon set with broad desktop support.
- Numix: Flat and colorful appearance.
- Arc: Clean GTK theme.
- Adwaita: GNOME inspired styling.
Customize the Budgie Panel
The Budgie panel controls the location and behavior of the application launcher, task list, system tray, and other desktop elements.
To customize the panel:
- Open Budgie Desktop Settings.
- Select Panels.
- Choose the panel you want to modify.
- Add, remove, or rearrange panel applets.
You can customize the panel by:
- Moving it to the top or bottom of the screen.
- Changing its size.
- Adjusting transparency.
- Adding new widgets.
- Creating additional panels.
Customize the Budgie Raven Sidebar
One feature that makes Budgie unique is the Raven sidebar. Raven provides quick access to:
- Notifications.
- Calendar.
- Media controls.
- System settings.
- Applets.
Raven can also be customized to better match your desktop style.
Create a Fully Custom Ubuntu Budgie Desktop
For users who want to remove Ubuntu Budgie branding completely, combine multiple customization options.
A fully personalized Budgie desktop can include:
- A custom Budgie Menu icon.
- A unique icon theme.
- A custom GTK theme.
- A personalized wallpaper.
- A customized panel layout.
- Modified Raven sidebar settings.
This allows Ubuntu Budgie to become a completely unique desktop environment while keeping the stability of the underlying Ubuntu system.
Budgie Custom Launcher Icon Tips
For the best results:
- Use SVG icons whenever possible.
- Choose simple designs that remain recognizable at small sizes.
- Use transparent backgrounds.
- Match the launcher icon with your overall desktop theme.
Recommended icon sizes:
| Panel Height | Recommended Icon Size |
|---|---|
| 24 pixels | 24x24 SVG or PNG |
| 32 pixels | 32x32 or 48x48 icon |
| Large custom panels | SVG scalable icon |
Ubuntu Budgie Customization Summary
| Customization | Method |
|---|---|
| Change menu icon | Budgie Menu settings |
| Change icon theme | Budgie Desktop Settings |
| Modify panels | Panel configuration |
| Customize sidebar | Raven settings |
| Remove Ubuntu branding | Custom icons and themes |
Why Choose Budgie for Customization?
Ubuntu Budgie offers a modern desktop experience while keeping customization simple. It provides a clean interface by default but still allows users to adjust nearly every visual element.
For users who want a polished Linux desktop that can be personalized without the complexity of advanced configuration, Budgie provides an excellent balance between simplicity and control.
Change the Lubuntu LXQt Start Menu Icon
Lubuntu uses the LXQt desktop environment, a lightweight and efficient desktop designed for users who want excellent performance with a traditional interface. Although Lubuntu focuses on speed and simplicity, LXQt still provides plenty of options for customizing the application launcher and removing default branding.
The Lubuntu menu is provided through the Application Menu widget located on the panel. Unlike older LXDE versions, modern LXQt provides built-in settings for changing the menu appearance without manually replacing system files.
Change the LXQt Application Menu Icon
To replace the Lubuntu menu icon:
- Right click the Application Menu button on the panel.
- Select Configure "Application Menu".
- Locate the menu icon setting.
- Select a new icon from your installed themes.
- Choose a custom image if you want to use your own logo.
- Save the changes.
The new launcher icon should appear immediately.
Using a Custom LXQt Launcher Icon
Changing the menu icon is useful for users who want to create a more personal desktop or remove Lubuntu branding.
Common custom icons include:
- A personal logo.
- A custom Linux distribution symbol.
- A matching icon from a desktop theme.
- A simple minimalist launcher graphic.
For best results, use an SVG icon because it scales cleanly across different panel sizes.
Customize LXQt Themes and Icons
LXQt separates the desktop appearance from the underlying operating system, allowing users to completely change the look and feel.
Open:
Preferences → LXQt Settings → Appearance
From here you can customize:
- Widget themes.
- Icon themes.
- Cursor themes.
- Font settings.
- Qt application appearance.
Popular icon themes compatible with LXQt include:
- Papirus: Modern and widely supported.
- Numix: Flat and colorful style.
- Breeze: KDE inspired design.
- Adwaita: Clean GNOME appearance.
Customize the LXQt Panel
The LXQt panel controls the application menu, task manager, system tray, and other desktop components.
To modify the panel:
- Right click the panel.
- Select Configure Panel.
- Adjust panel settings and widgets.
LXQt allows you to:
- Move the panel to another screen edge.
- Resize the panel.
- Add or remove widgets.
- Change transparency.
- Create additional panels.
Create a Custom Lubuntu Desktop
Although Lubuntu is designed for lightweight computing, it can still be customized into a completely unique desktop environment.
Common customizations include:
- Replacing the default menu icon.
- Installing a new icon theme.
- Changing the Qt theme.
- Customizing the panel layout.
- Adding application launchers.
- Using personalized wallpapers.
This makes Lubuntu useful for older computers, custom workstations, kiosks, and users who want a fast desktop without sacrificing personalization.
Remove Lubuntu Branding
To create a more neutral or custom branded LXQt installation:
- Replace the Application Menu icon.
- Use a different icon theme.
- Change the wallpaper.
- Customize the panel layout.
- Replace default themes.
- Create custom shortcuts and menus.
Because LXQt stores these settings in the user's configuration files, your changes do not normally require root access and are easy to undo.
LXQt Custom Menu Icon Tips
For the best appearance:
- Use SVG files whenever possible.
- Match the icon design with your selected theme.
- Avoid complex images that become unclear at small sizes.
- Use transparent backgrounds for a cleaner panel appearance.
Recommended launcher icon sizes:
| Panel Height | Recommended Icon Size |
|---|---|
| 24 pixels | 24x24 SVG or PNG |
| 32 pixels | 32x32 or 48x48 icon |
| Large custom panels | SVG scalable icon |
Lubuntu LXQt Customization Summary
| Customization | Method |
|---|---|
| Change menu icon | Application Menu widget settings |
| Change icon theme | LXQt Appearance settings |
| Modify panel | Panel configuration |
| Change desktop style | Qt themes and wallpapers |
| Remove Lubuntu branding | Custom icons and themes |
Why Choose LXQt for Customization?
Lubuntu LXQt is an excellent choice for users who want a lightweight desktop that remains flexible. It provides a traditional application menu, low resource usage, and enough customization options to create a personalized Linux environment.
For older hardware, portable systems, virtual machines, or users who prefer a fast and simple desktop, Lubuntu provides a practical foundation for building a custom Ubuntu experience.
Legacy Method: Change the Ubuntu GNOME 2 Start Menu Icon
Before Ubuntu moved to GNOME Shell, many older Ubuntu releases used the GNOME 2 desktop environment. This included the classic top panel with an Applications menu and a small Ubuntu logo known as the Start Here icon.
On these older systems, changing the menu icon was done by replacing the icon file inside the installed icon theme.
Important: This method applies only to legacy GNOME 2 based Ubuntu versions such as Ubuntu 7.10, Ubuntu 8.04, and similar releases. It does not apply to modern Ubuntu versions using GNOME Shell, KDE Plasma, Xfce, Cinnamon, MATE, Budgie, or LXQt.
Modern desktops use different configuration systems and should be customized through their built-in settings instead.
How the Old Ubuntu Menu Icon Worked
In GNOME 2, the Applications menu button displayed the icon named:
start-here.pngor:
start-here.svgdepending on the installed icon theme.
The file was stored inside the active icon theme directory and could be replaced with a custom image.
Requirements for the GNOME 2 Method
Before changing the icon, make sure:
- You are using a GNOME 2 based Ubuntu installation.
- You know the active icon theme.
- You have administrator access.
- Your replacement icon matches the panel size.
The default Ubuntu Human icon theme used locations similar to:
/usr/share/icons/Human/22x22/places/Modern systems may use different paths because icon themes have changed significantly.
Create a Custom Ubuntu Menu Icon
For the best appearance:
- Create a simple logo or symbol.
- Use a transparent background.
- Match the original panel icon dimensions.
- Save the file using the same name as the original icon.
Recommended sizes:
| Panel Height | Icon Size |
|---|---|
| 24 pixel panel | 22x22 pixels |
| 32 pixel panel | 32x32 pixels |
| Larger custom panels | SVG scalable icon |
Replace the GNOME 2 Start Menu Icon
To replace the default Ubuntu icon:
1. Locate the Current Icon
Open a terminal and locate the active icon theme:
/usr/share/icons/Find the theme currently being used and locate the:
placesdirectory.
For the old Human theme, the location was:
/usr/share/icons/Human/22x22/places/2. Backup the Original Icon
Before replacing files, create a backup:
sudo cp start-here.png start-here-backup.pngThis allows you to restore the original Ubuntu branding later.
3. Copy Your Custom Icon
Copy your replacement icon into the same directory:
sudo cp my-icon.png /usr/share/icons/Human/22x22/places/start-here.pngReplace the file name and path with the correct location for your icon theme.
4. Refresh the Icon Cache
Some GNOME 2 installations cache icons. Refresh the cache with:
sudo gtk-update-icon-cache /usr/share/icons/Human/5. Restart the GNOME Panel
Reload the panel:
killall gnome-panelThe Applications menu should now display your new custom icon.
Restoring the Original Ubuntu Icon
If you want to return to the default Ubuntu appearance:
- Restore your backup copy of the original icon.
- Refresh the icon cache.
- Restart the GNOME panel.
Your original Ubuntu menu button will return.
Why This Method Is No Longer Recommended
Replacing system icon files worked well on older Ubuntu releases, but modern Linux desktops have moved toward user-level customization.
Directly modifying files inside:
/usr/share/icons/has several disadvantages:
- System updates can overwrite your changes.
- Multiple users share the same modified files.
- It requires administrator permissions.
- It is harder to undo.
For modern Ubuntu installations, desktop-supported customization methods are safer and more flexible.
Legacy GNOME 2 Customization Summary
| Task | Method |
|---|---|
| Change menu icon | Replace start-here icon file |
| Location | Icon theme places directory |
| Refresh icons | gtk-update-icon-cache |
| Reload desktop panel | Restart gnome-panel |
| Modern alternative | Use desktop customization settings |
Preserving Old Ubuntu Customization Knowledge
Although GNOME 2 is no longer the default Ubuntu desktop, this method remains useful for historical systems, archived computers, and Linux enthusiasts maintaining older installations.
Understanding how the original Ubuntu desktop worked also explains how Linux customization has evolved from manually replacing files to using flexible themes, extensions, and desktop settings.
Create Your Own Ubuntu Start Menu Icon and Custom Branding
Replacing the default launcher icon is one of the easiest ways to personalize Ubuntu, but you can take customization much further by creating a complete desktop branding package.
A custom Linux desktop can include its own menu icon, wallpaper, icon theme, login screen, and application styling. This approach is commonly used by enthusiasts, organizations, schools, and Linux distribution creators who want a consistent identity.
Designing a Custom Menu Icon
A good launcher icon should remain recognizable even when displayed at a small size on a panel.
When creating your own icon:
- Use simple shapes and clean designs.
- Avoid small details that disappear when scaled down.
- Use transparent backgrounds.
- Choose colors that contrast with your panel.
- Create an SVG version whenever possible.
SVG files are ideal because they scale smoothly across different screen resolutions and desktop environments.
Recommended Icon Specifications
| Use Case | Recommended Format |
|---|---|
| Modern Linux desktops | SVG |
| Simple custom images | PNG |
| Small panel buttons | 24x24 or 32x32 pixels |
| High resolution displays | 48x48 SVG or larger |
Create a Complete Desktop Branding Theme
For a completely customized Ubuntu experience, combine several visual elements:
- Custom menu icon.
- Matching application icons.
- Custom GTK or Qt theme.
- Personalized wallpaper.
- Custom fonts.
- Modified panel layout.
- Custom login screen artwork.
When these elements match, Ubuntu can look completely different while still maintaining the reliability of the underlying operating system.
Building a Custom Linux Distribution Appearance
Many Linux distributions are based on Ubuntu but use their own branding. They typically customize:
- Desktop wallpapers.
- Default themes.
- Application launcher icons.
- Boot screens.
- Login screens.
- Default applications.
Using the customization methods in this guide, you can create a similar personalized experience without creating an entirely new operating system.
Where to Find Linux Icons and Themes
Many free resources are available for creating a custom desktop appearance.
Popular sources include:
- Linux icon themes included with your desktop environment.
- Open source icon projects.
- SVG icon libraries.
- Community created desktop themes.
Always check the license before redistributing custom artwork, especially when creating a branded system for others.
Troubleshooting Ubuntu Menu Icon Changes
Although changing a launcher icon is usually simple, some desktop environments cache icons or handle menu buttons differently. If your new icon does not appear immediately, try the solutions below.
The New Icon Does Not Appear
If the old icon remains visible:
- Log out and log back in.
- Restart the desktop panel.
- Clear the icon cache.
- Verify that the icon path is correct.
- Check that the image format is supported.
Restarting Desktop Panels
Some desktop environments require the panel to restart before changes appear.
Examples:
GNOME Shell:
Alt + F2
r
Enter
Xfce:
xfce4-panel -rMATE:
mate-panel --replaceKDE Plasma:
kquitapp5 plasmashell
kstart5 plasmashell
Commands may vary depending on your desktop version.
The Icon Looks Blurry
A blurry launcher icon usually means the image resolution is too small.
Solutions:
- Use an SVG image.
- Create a larger PNG version.
- Match the icon size to your panel height.
- Avoid stretching small images.
The Icon Resets After an Update
If your customization disappears after a system update, you are probably modifying a system file.
Modern recommended solutions:
- Use desktop settings instead.
- Use icon themes stored in your home directory.
- Use GNOME extensions where available.
- Avoid modifying files inside system directories.
The Menu Icon Option Is Missing
If your desktop does not provide a direct icon setting:
- Check which desktop environment you are using.
- Install a supported menu extension if available.
- Use an alternative launcher.
- Change the complete icon theme instead.
Frequently Asked Questions
Can I remove the Ubuntu logo from the Start Menu?
Yes. The method depends on your desktop environment. GNOME users typically use extensions such as ArcMenu, while KDE, Xfce, Cinnamon, MATE, Budgie, and LXQt provide built-in customization options.
Can I completely rebrand Ubuntu?
Yes. You can replace the menu icon, themes, wallpapers, icons, and many other visual elements. Creating a complete distribution style requires additional customization beyond the desktop environment.
Can I change the Ubuntu Activities icon?
Modern GNOME Shell does not support replacing the Activities icon directly through normal settings. GNOME extensions provide the recommended way to create a customized menu experience.
Do I need root access to change the menu icon?
Usually no. Modern desktop environments store customization settings in your user profile. Older GNOME 2 methods required administrator access because they replaced system icon files.
Will changing the menu icon break Ubuntu?
Using desktop settings, themes, and extensions is generally safe. Directly replacing system files can cause your changes to be overwritten by updates.
What is the easiest Ubuntu desktop to customize?
KDE Plasma is generally considered one of the most customizable Linux desktops. Cinnamon, MATE, and Xfce also provide extensive customization while keeping a traditional desktop layout.
Can I make Ubuntu look like Windows?
Yes. KDE Plasma, Cinnamon, Xfce, and MATE can all be configured with a bottom panel, Start Menu style launcher, and Windows-like themes.
Can I make Ubuntu look like macOS?
Yes. Many Linux desktops support macOS inspired themes, docks, icon sets, and panel layouts.
Final Thoughts on Customizing Ubuntu
Ubuntu has evolved significantly over the years. Early releases relied on manually replacing icon files, while modern Ubuntu desktops provide safer and more flexible customization systems built directly into the desktop environment.
Whether you want to remove the Ubuntu logo, create a custom workstation, build a branded Linux system, or simply make your desktop feel more personal, there are many ways to achieve the look you want.
The best approach is to use the tools provided by your desktop environment:
- GNOME users can use extensions and themes.
- KDE Plasma users have nearly unlimited built-in customization.
- Xfce provides lightweight but powerful control.
- MATE preserves the classic customizable Linux desktop.
- Cinnamon offers a familiar Start Menu experience.
- Budgie provides modern customization with simplicity.
- LXQt delivers flexibility while remaining lightweight.
The days of editing system files just to change a menu icon are mostly behind us. Modern Linux desktops make it possible to create a completely unique experience while keeping your installation stable, secure, and easy to maintain.
With the right combination of icons, themes, layouts, and personalization settings, Ubuntu can become a desktop that truly feels like your own.