How to create an Xubuntu Live USB bootable flash drive while running from the Live CD. The following segment explains how to easily make a USB Xubuntu by using Ubuntu's Official Startup Disk Creator (USB Creator). Ubuntu's Casper Persistence option is additionally being used here. Enabling you to save and then restore your basic changes on subsequent boots.
Xubuntu is a fork of Ubuntu that utilizes an XFCE desktop instead of Gnome. It was designed to use less system resources than Ubuntu or Kubuntu.
Distribution Home Page: Project Page
Persistent Feature: Yes
USB Xubuntu Boot Prerequisites:
- Xubuntu Live CD/DVD
- Computer with a working CD/DVD Drive
- A fast USB drive - Good Flash Drive recommendations
- Startup Disk Creator (USB Creator)
Creating an USB Xubuntu Bootable Flash Drive
NOTE: The Startup Disk Creator already exists on older Xubuntu versions. However, it is not packaged with the newer releases. To Install the Startup Disk Creator, Open up a terminal Window using Ctrl+Alt+T
Then to add the USB Creator, type the following command from the terminal, and then press Enter.
sudo apt install usb-creator-gtkPress Y to proceed with the install.
Important: Back up all data from your USB flash drive before proceeding!
- Download an Xubuntu ISO file and burn it to a CD or DVD.
- Restart your computer, booting from your Live CD or DVD.
- Insert a USB flash drive.
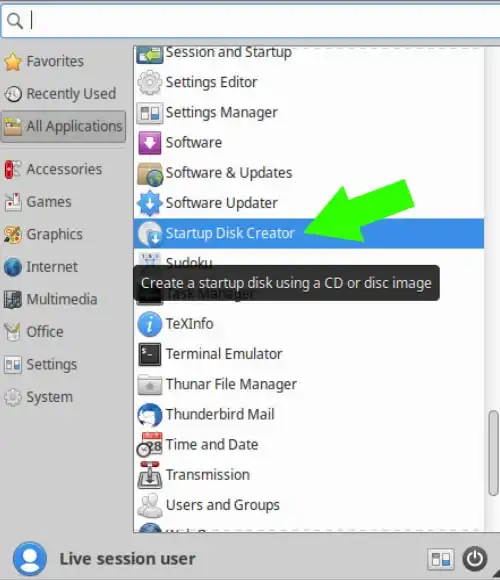
- a.) Latest Xubuntu versions, navigate to All Applications > Startup Disk Creator
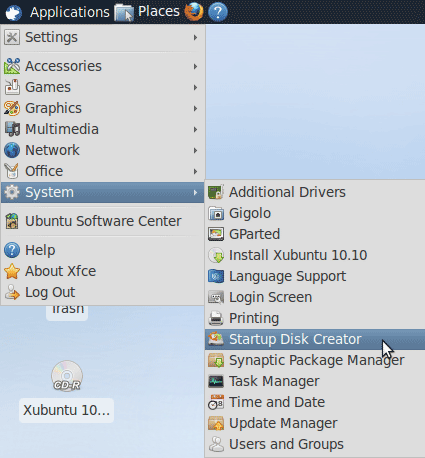
b.) Older releases, navigate to Applications > System > Startup Disk Creator
- (1.) Select your USB flash drive from Disk to use
(2.) Then choose to Erase Disk
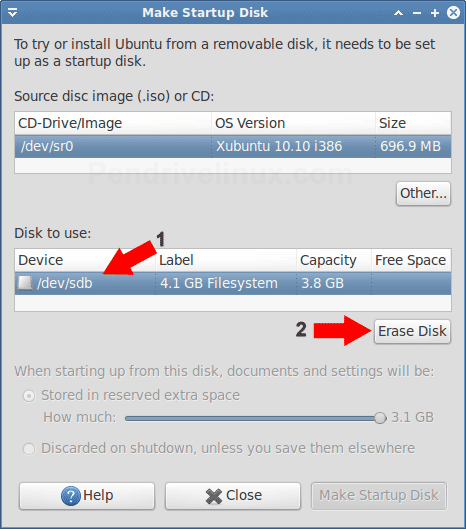
- (1.) Select the Device Partition related to your USB flash drive.
(2.) For persistence, select the option Stored in reserved extra space and then adjust the slider to desired capacity.
(3.) Click Make Startup Disk
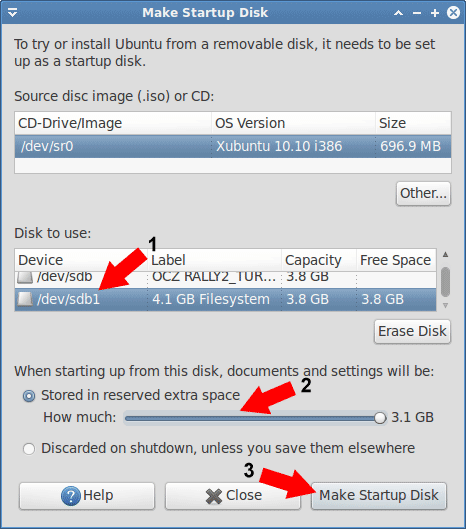
- A bar appears indicating progress of your Xubuntu Live USB install. Once installation is complete:
(1.) Remove the CD and restart your computer.
(2.) Then during the system post, use your BIOS Hotkey to enter your BIOS.
(3.) Set your BIOS or boot menu to boot from the USB drive and proceed to boot.
Booting from a Live USB Xubuntu
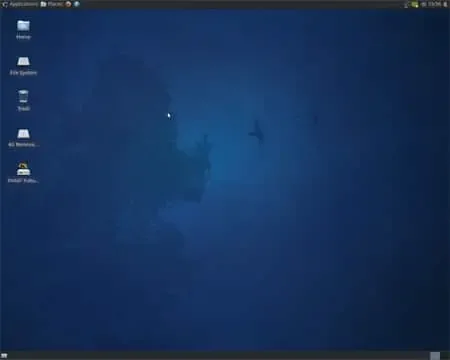
You should now be running from your newly created Xubuntu USB bootable flash drive, which you can also use to Install Xubuntu from USB to a Hard Drive.

