Ubuntu Remote Desktop screen sharing with Windows and Linux. The following tutorial covers the process of remotely accessing and controlling an Ubuntu desktop screen from another Linux or Windows computer. This remote screen sharing process should also work for other Debian based operating systems with minimal changes. Ubuntu Remote Access is possible as long as the system is connected to a network or has an internet connection established. The client can remotely connect using vnc viewer.
One major advantage of using Remote Desktop Screen sharing is that once the system is up and running, you do not need a monitor, keyboard or mouse connected to the host machine. The box running Ubuntu or a Debian based OS can be controlled directly from another machine that already has those hardware components in place. Another great advantage is that you can remotely access and control or administer your system from another location. Possibly outside of your local network, ie: work, school, friends house etc.
Ubuntu Remote Control Prerequisites:
- Ubuntu based OS (running with a network connection)
- Windows or Linux host to be used for remote connection
- VNC Viewer
How to Setup Ubuntu Remote Desktop Screen Sharing
First, make sure Vino is installed to allow screen sharing and remote access.
- Open a terminal by pressing Ctrl + Alt + T
- Type the following into the terminal and press Enter.
sudo apt install -y vino
- When prompted, type your password and press Enter.
- In order for VNC Viewer to connect from a Windows client, we will need to disable encryption. To do this, type the following command and press Enter.
gsettings set org.gnome.Vino require-encryption false
After installing Vino and disabling encryption. Back at the desktop,
- Click Show Applications
- Then select Settings
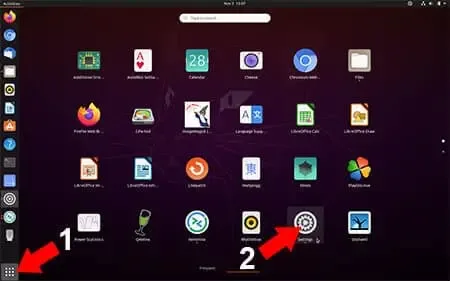
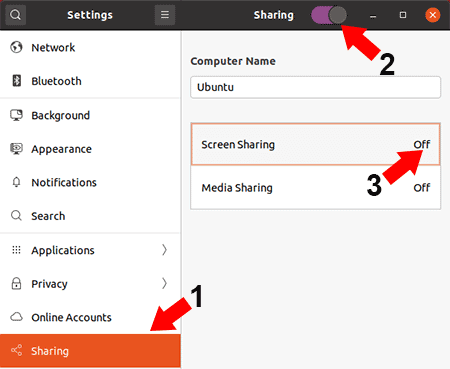
From the Settings window,
-
- Scroll down and click Sharing
- Toggle the Sharing Slider to turn it On.
- Click the Screen Sharing box to open its options.
Finally, from the Ubuntu Screen Sharing Options window,
- Toggle Screen Sharing slider to On
- Enter a Password to restrict Remote Access
- Then, Toggle Network connection to On
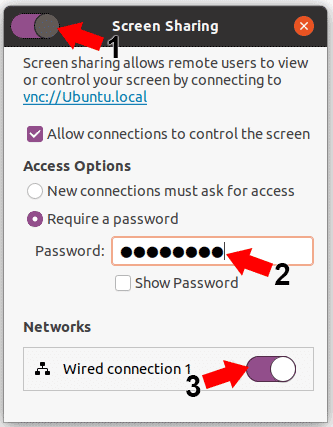
Make note of your hostname I.E. vnc://Ubuntu.local
Click X to close the Window.
Find your Local IP Address on Ubuntu
To find your local IP address on Ubuntu, go to the Settings Window,
-
- Scroll to and click Network
- Click the little Gear Icon.
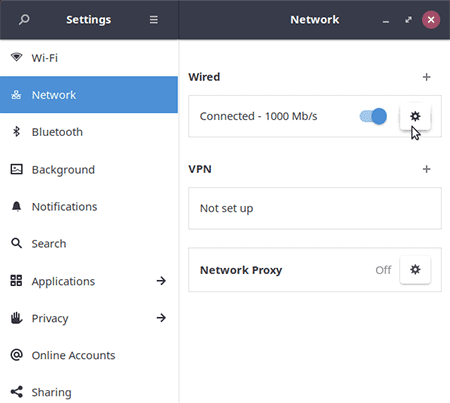
You will find your Ubuntu Local IP address listed next to the IPv4 Address.
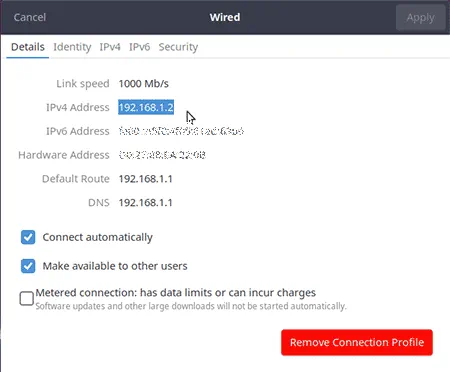
Next, move to the Windows machine you will be remotely accessing Ubuntu from. If you will be connecting from a Linux client, go to section B.
A. Ubuntu Remote Desktop from Windows
Here we will use VNC Viewer to access an Ubuntu Remote Desktop from Windows.
Download VNC Viewer and install the program (Free version works fine).
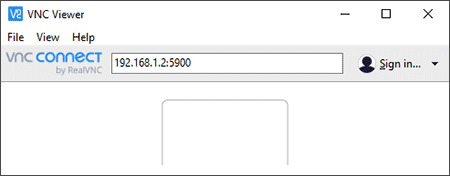
- Launch VNC Viewer 4 from Windows (search VNC Viewer).
- Type the IP address of your Linux system and press Enter (append :5900 for the port).
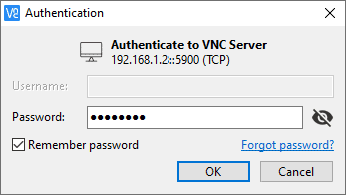
Next, in the VNC Viewer Authentication window, enter your remote access Password and click OK
If all goes well, you should now have Ubuntu Remote access from Windows. Note that you can also connect using the internet broadcasted IP address. However, if you are using a router, you will need to ensure that port 5900 is open for the local IP of the Linux box.
B. Ubuntu Remote Desktop from Linux
How to use VNC Viewer from Linux for Ubuntu Remote Control.
- Open a terminal Ctrl + Alt + T,
- Type the following, then press enter.
sudo apt-get install remmina
- Once prompted, type your password, and then press enter.
- Finally, to start the program, type the following, and press enter.
remmina
Now simply type the IP address of the Linux box you wish to connect to and click OK
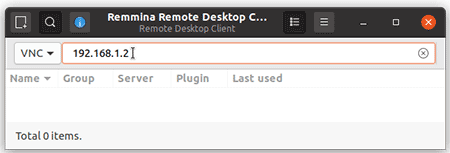
If all goes well, you should be remotely connected to your Ubuntu Linux.
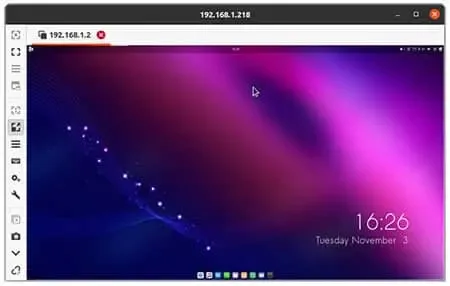
Note that you can also connect using the internet broadcasted IP address. To do this, (if your using a router) you need to ensure that port 5900 is open for the local IP of the Linux machine.

