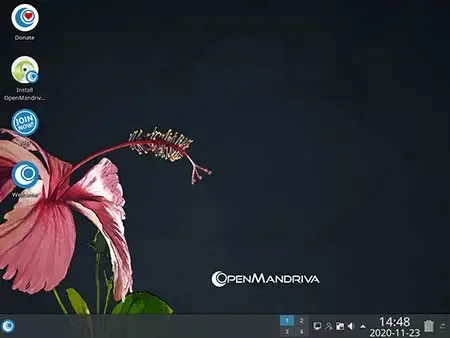
This simple tutorial explains how to put OpenMandriva on a USB Flash Drive from within a running Windows environment by using YUMI. Upon completion, the resulting Bootable USB can be used to try out Open Mandriva Live on USB. You can also use the Bootable USB to install to your hard drive, instead of using a traditional CD/DVD ROM for installation.
Live OpenMandriva USB Bootable

- Distribution Home Page: Project Page
- Developer: OpenMandriva Association
- Persistent Feature: No
What is OpenMandriva?
OpenMandriva is a Linux distribution that aims to provide an open source and user friendly computing environment. It is a fork of and successor to the Mandriva Linux distribution. It typically features the KDE Plasma desktop environment as its default, although users can install and use other desktop environments as well.
This distro inherits many of its characteristics from Mandriva Linux, which was a popular Linux distribution until financial difficulties led to its discontinuation. The community driven effort to continue the Mandriva legacy resulted in the creation of OpenMandriva. It's features include:
- KDE Plasma Desktop: Uses the KDE Plasma desktop environment as its default, providing a visually appealing and user friendly interface.
- Package Management: Uses the urpmi package manager, which simplifies the installation, removal, and updating of software packages.
- Community Driven: It relies on contributions from the community. Users and developers collaborate to improve and maintain the distribution.
- Rolling Release Model: Follows a rolling release model, which means that updates are continuously released, and users can receive the latest software without reinstalling the entire operating system.
- Multilingual Support: Provides support for multiple languages, making it accessible to users around the world.
- Free and Open Source: Being built on open source principles, this Linux distribution is freely available for users to download, use, modify, and redistribute.
OpenMandriva USB Drive Creation Essentials
- Windows 8/10/11
- Computer that can boot from USB
- OpenMandriva ISO file
- USB Flash Drive
- YUMI (Multiboot USB Creator Tool)
How to Make a Bootable Open Mandriva USB
- Download the OpenMandriva ISO file.
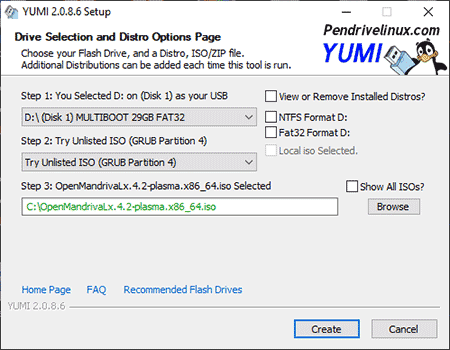
- Download and launch the YUMI USB Boot creator software
- (1.) Choose your flash drive from the drop down list.
(2.) Then select Try Unlisted ISO from the list.
(3.) Browse to your ISO file, and then click Create.

- Once the YUMI script has finished, restart your PC and set your BIOS or Boot Menu to boot from the USB device. Save your changes and then reboot.
If all went smoothly, you should be presented with a YUMI Boot Menu option that you can now select to Boot your Live OpenMandriva USB flash drive.


