
USB Feather Linux (Historical): Create a bootable USB drive for Feather, a very small (<128MB), minimalist Debian-based distribution designed for speed and efficiency. This guide shows how to write the ISO to a USB for booting, testing, or exploring lightweight Linux, primarily for archival or educational purposes.
USB Feather Linux Overview

About This Distribution
- Distribution Home Page: Project Archive
- Minimum Flash Drive: 128MB
- Persistence: Not supported; all session data is lost after reboot
- Basic Requirements: PC running Windows or Linux, USB flash drive, ISO file, YUMI or dd utility
Why Use Feather Linux Today?
This ultra lightweight distribution provides a historical example of portable Linux. Use it for:
- Exploring legacy Linux systems
- Testing extremely lightweight OS environments on old hardware
- Educational purposes or portable experimentation
Create a Feather Linux Bootable USB on Windows
- Download the Feather Linux ISO.
- Download and run YUMI Multiboot USB Creator.
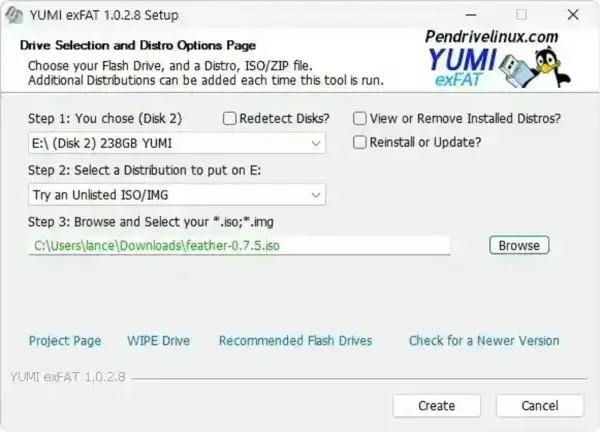
- Open YUMI and follow these steps:
- Select your USB drive from the dropdown.
- Choose Try Unlisted ISO/IMG.
- Browse to your downloaded ISO and select it.
- Click Create to write the image to the USB.
- Reboot, enter BIOS/UEFI, set USB as the primary boot device, and boot this lightweight OS from the YUMI menu.
Create a Feather Linux Bootable USB on Linux
Method 1: Using dd
sudo dd if=/path/to/feather.iso of=/dev/sdX bs=4M status=progress && sync- Replace
/path/to/feather.isowith your ISO path. - Replace
/dev/sdXwith your USB device (e.g.,/dev/sdb). - Verify the device with
lsblkorsudo fdisk -lto avoid overwriting your main drive.
Optional Floppy Boot
For very old systems without USB boot support:
- Download the Boot Floppy Image.
- Write it to a floppy disk and boot your PC to load the OS from USB.
Notes
- No persistence: all changes are lost after reboot.
- May require enabling legacy BIOS boot options on modern PCs.
- This distribution is archival and not actively maintained—use for historical or experimental purposes.