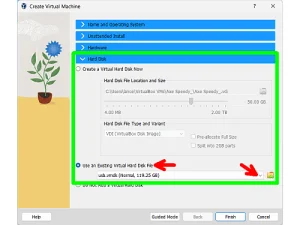
Convert a VDI or VHD Virtual Machine into a bootable USB drive. Directly boot from VHD or VDI files; Turning VirtualBox "VHD" (Virtual Hard Disk) Images or "VDI" (Virtual Disk) Images into a bootable physical disk. Copy VHD to Disk to make a USB Virtual Machine.
This can be extremely useful for situations when you would like to clone your VirtualBox Machine onto a real device and run them as real systems.
Make a USB Boot from VHD (VirtualBox Image)
Those once virtual machines containing full operating systems can then be booted and run natively from an external USB drive. Resulting in fully installed Linux or Windows systems booted from a USB thumb drive or other external device, instead of VirtualBox.
Convert VirtualBox Image to Physical Disk (Windows)
The following assumes that you are up and running from Windows and your flash drive is already inserted. First you will need to create a Raw Image from the VDI or VHD File. To do this:
- Open a Windows Command Prompt.
- From the Command Line, type
cd %programfiles%\oracle\virtualbox - Then to convert a .vdi or .vhd file to an disk .img file. Assuming your files are stored in the .VirtualBox directory, type the following as a single line.(replacing filename with your actual file name, and vdi with vhd if the file is a vhd)
VBoxManage internalcommands converttoraw "%USERPROFILE%\.VirtualBox\filename.vdi" "%USERPROFILE%\.VirtualBox\filename.img"Or, if your files are stored in the VirtualBox VMs directory, use the following command string.
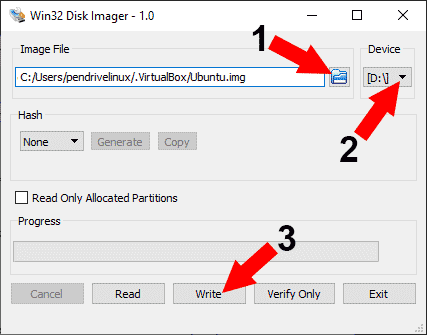
VBoxManage internalcommands converttoraw "%USERPROFILE%\VirtualBox VMs\filepath\filename.vdi" "%USERPROFILE%\VirtualBox VMs\filepath\filename.img"Next, you need to raw data write the file to the external USB drive. To do this, you can use tools like Etcher, Win32 Disk Imager, or even dd. Here we will use Win32 Disk Imager as using this image writing tool is fairly simple:
- Download win32 Disk Imager, install and then run it (as Administrator).
- (1.) Select the disk image you created earlier.
(2.) Select your USB Device.
(3.) Then click Write. Warning: All content will be overwritten!
You should now have a USB bootable clone of your VirtualBox Virtual Machine. To test that it works, making sure you can USB boot from VHD:
- Begin to reboot your PC.
- Within the first few seconds (during system post), enter your BIOS or UEFI via your motherboard manufacturer hotkey.
- From your BIOS/UEFI boot options, set your external thumb drive as the first boot device.
- Save your changes (using the F10 key) and let the system startup from your USB.
Pro Tip: You could also try Booting a flash drive from VirtualBox, which can be accomplished without rebooting.
Convert VirtualBox Image to Physical Disk (Linux)
The following section covers how to perform the same task from a running Linux with VirtualBox installed. Again, I used Ubuntu in this example.
- Open a terminal Ctrl+Alt+T
- From the terminal, change to the directory where your .vdi or .vhd is stored. For example, replacing with your actual path, type;
cd /home/ubuntu/'VirtualBox VMs'/path - Then type the following to convert the Virtual Machine to a Raw Image. Replacing filename with your actual filename, and vdi with vhd if necessary.
sudo VBoxManage internalcommands converttoraw filename.vdi filename.img - Next type the following and note which device belongs to your USB drive.
fdisk -l - Then use DD (Disk Dump) to raw write the image back to your USB device by typing the following. Again replacing filename with your file and sdX with your actual device.
Warning: All content on the drive will be overwritten!dd if=filename.img of=/dev/sdX status=progress
This concludes the process to Convert Virtual Machine to Bootable USB so you can boot from VHD. If you found this tutorial useful, you might also be interested in learning how to Boot from a USB in VirtualBox


