Easily Create Your Own Live Linux distro, remix or spin; Creating your own custom Live Linux distro and resulting ISO file is not overly complicated. However, there are many different approaches depending mainly on which Linux base you decide to use. Many popular Linux distributions such as Knoppix, Ubuntu and DSL were originally based upon Debian.
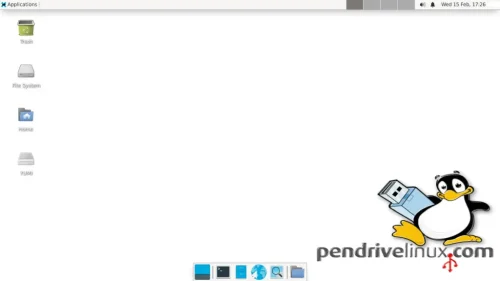
In the following tutorial, we will first focus on using Debian as our base to create a Debian Live Linux ISO. Here's an example showing Pendrivelinux Live - based on a remix of Debian;

Note: The resulting Debian remix created via this process can be burned to a USB flash drive or run in emulation or virtualization software such as virtualbox, vmware, or even Qemu/KVM.
From a locally installed up and running Debian operating environment, we will use a tool formerly called Live-Helper (now Live-Build). It is part of the Debian Live Project originally created by Daniel Baumann. Live-Build contains scripts that automate parts of the Live Linux creation process, making it easy to create your own personal Live Linux distribution.
How to Create your own Live Linux Debian Remix
Creating your own Live Linux Distro from Debian is a multi-step process. Here's How to create your own remix of Debian Live or an Ubuntu Spin;
Download and install Live-Build Script
Let's start by downloading and installing the Live-Build script. Open a terminal and type the following, pressing the enter key after each command.
su -
(and then enter a password when prompted to become root)
apt-get update
(to ensure we are working with the latest versions).
apt-get install live-build
Configuring settings for a custom Live Distro
Now we will need to create a build directory and then populate our initial configuration. To do this, from the terminal, type;
mkdir live
cd live
lb clean
Next we set our config options for a minimal Debian live build, and then drop to an interactive shell so we can add more packages and make changes. Note how we're building with both amd64 and intel processor support. You'll probably want to edit at least your hostname before copying the following into the terminal;
lb config noauto --architectures i386 --linux-flavours 686-pae 686 amd64:amd64 --binary-images iso-hybrid -d bullseye --debian-installer live --debian-installer-distribution bullseye --debian-installer-gui false --archive-areas "main contrib non-free" --debootstrap-options "--variant=minbase" --bootappend-live "boot=live persistence components hostname=pendrivelinux" --interactive shell
Next we need to add some essential packages. For example to install a basic lightweight xfce4 graphical environment with lightdm, a chrome based browser, gparted for disk editing, gedit and nano for file editing, type;
echo xfce4 ifupdown net-tools network-manager nano chromium gparted gedit >> config/package-lists/my.list.chroot
Now that we have finished making our configuration changes, and added some essential packages, we can proceed with the build process.
To begin the building process, type;
lb build
Adding additional packages and making changes
During the build process, live-build will create a directory named chroot containing the Linux filesystem that will later be compressed. Once live-helper has finished installing the core components, it will start an interactive shell (changing the root directory to chroot) essentially pausing the build and allow you to install additional packages and make changes or adjustments before it compresses the filesystem and builds the final Live Linux ISO.
Once your dropped to the interactive shell, you'll see something like the following;
Pausing build: starting interactive shell...
Now the time to make your final changes. Here you can add additional packages using apt-get install if you want. At this point you can also open another terminal window and copy the personalized contents from a users home directory on the system you are running from and copy them to the /live/chroot/etc/skel directory of the chrooted live build. This will essentially duplicate that users settings on the new build.
After you are done making additional changes, allow the live-build to continue by typing;
exit
Testing the Live Linux Distribution you created
Once live-build script has finished, you will find your completed ISO in the live directory. For example; live-image-i386.hybrid.iso
How to write an ISO to a USB
You can now use the ISO and boot it as is with any automated program such as YUMI, or if you'd rather, here is one way to write ISO to USB.
From the terminal, type
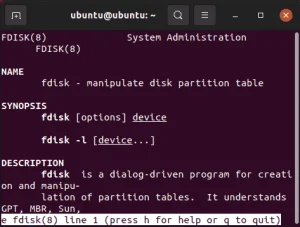
fdisk -l
and then locate your USB device. Example: dev/sdx (where x represents your flash drive).
Now to write the IMG to a USB drive, type
umount /dev/sdx
dd if=live-image-i386.hybrid.iso of=/dev/sdx bs=1M status=progress
Finally, restart your PC. Enter your BIOS or Boot Menu during startup. Then, select your USB as the first boot device. And reboot.
You should now be booting from your custom Live USB.
Note: With your CD or USB build, you can save your changes back to a drive via the persistent feature. Simply create a partition on the device labeled persistence and include a persistence.conf file, to enable saving and restoring of settings/changes.
To create a persistent file for Debian, type;
mkfs.ext4 -L persistence /dev/sdx2
mount /dev/sdx2 /mnt
cd /mnt
echo "/ union" > persistence.conf
sync
cd ..
umount /dev/sdx2
And that's one way to create your own live linux distribution. A Debian Remix based on a Debian Live build. ;)

